







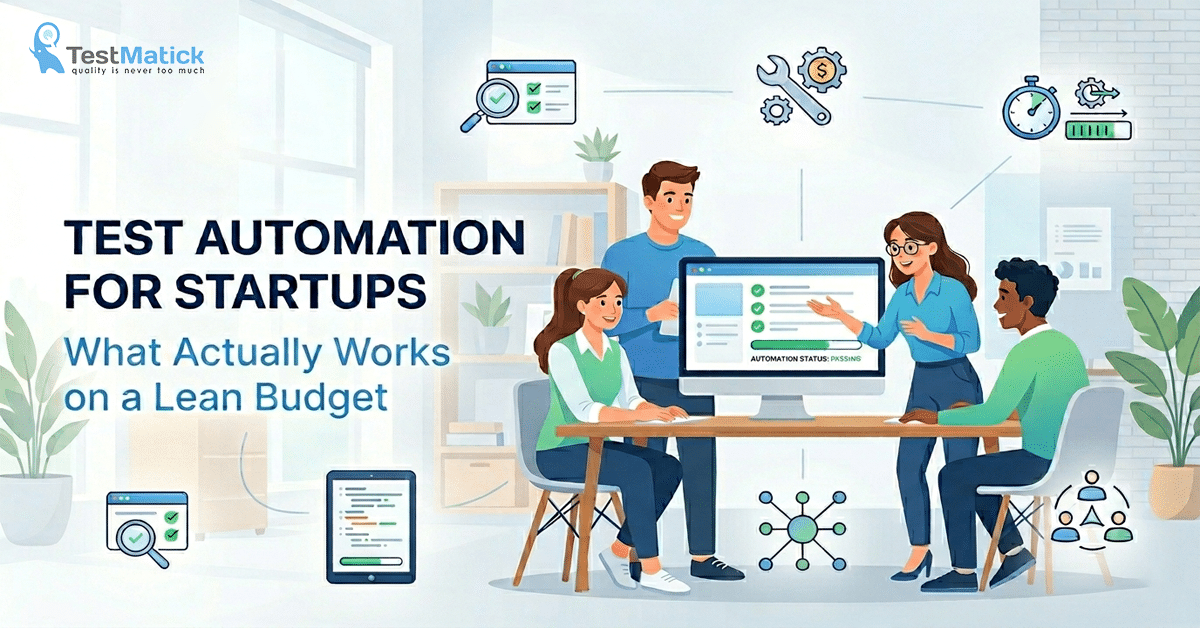
A practical guide to building automation that pays for itself — without the enterprise budget
Test automation has a perception problem in the startup world.
Teams that have seen it done badly — sprawling test suites that take hours to run, scripts that break every time a developer changes a button label, infrastructure costs that rival a junior engineer’s salary — conclude that automation is an enterprise problem. Something you do when you have a dedicated QA team and a proper budget.
That perception is expensive. The startups that delay automation the longest consistently spend the most on QA overall — in manual testing time, in production incidents, in the engineering hours spent firefighting bugs that a well-placed automated test would have caught in 30 seconds.
Automation doesn’t have to be expensive or complicated. It does have to be implemented at the right time, with the right tools, in the right scope. This guide covers all three — plus a real example of a startup that went from zero automation to 80% coverage in 90 days for less than the cost of a single month of manual testing.
When to start automating
The most common automation mistake startups make isn’t choosing the wrong framework. It’s starting too early.
Test automation is infrastructure. Like all infrastructure, it has a maintenance cost. Every time your application changes — and in an early-stage startup, it changes constantly — scripts that reference the old state of the application break and need to be updated. If you’re automating a product that looks fundamentally different every 60 days, you’re spending more time maintaining tests than writing them.
The right time to start automating is after product-market fit. Specifically, when these three conditions are true:
- Your core user flows are stable — the primary scenarios a user takes through your product haven’t changed significantly in the last 2-3 months
- Your release frequency is increasing — you’re shipping weekly or more often, and manual regression testing is becoming a bottleneck
- You have paying customers who depend on stability — the cost of a production regression has real consequences
Before these conditions are true, invest in manual testing — either with a dedicated QA person or a QA partner who can do pre-release checks without the overhead of building an automation suite. After these conditions are true, automation starts paying back quickly.
One useful heuristic: if your manual testers are running the same test scenarios more than three times, those scenarios are candidates for automation. If every scenario is different every sprint because the product is still being figured out, you’re not ready.
Framework selection: Cypress vs Selenium vs Playwright
The framework debate is real, and the right answer depends on your stack, your team’s experience, and what you’re testing. Here’s an honest breakdown of the three most common options:
Cypress
Best for JavaScript/TypeScript teams testing modern web applications. Cypress runs in the browser, which makes it fast, reliable, and easy to debug. The developer experience is genuinely good — tests are readable, the test runner is visual, and the documentation is excellent.
Tradeoffs: Cypress only supports Chromium-based browsers and Firefox — no Safari, which matters if your users are iOS-heavy. It’s also JavaScript-only, so if your team works in Python or Java, the learning curve is real. Cost to get started: low. A developer with JavaScript experience can write useful tests within a day.
Selenium
Best for teams that need cross-browser coverage including Safari, or teams working in languages other than JavaScript. Selenium supports Java, Python, C#, Ruby, and JavaScript and works with every major browser.
Tradeoffs: Selenium is more complex to set up and maintain than Cypress. Tests are slower, flakiness is a more common problem, and the debugging experience is less friendly. It’s the right choice when you need its specific capabilities — cross-browser coverage, non-JavaScript language support — and a more demanding choice otherwise.
Playwright
Best for teams that want Cypress-level developer experience with broader browser support. Playwright supports Chromium, Firefox, and WebKit (Safari), runs fast, and has excellent multi-language support including JavaScript, Python, Java, and C#.
As of 2026, Playwright has become the default recommendation for new projects at many QA consultancies, including TestMatick. For most startups starting automation in 2026, Playwright is worth serious consideration as the default choice.
| Factor | Cypress | Selenium | Playwright |
| Setup speed | High | Medium | High |
| Learning curve | Easy | Moderate | Moderate |
| Cross-browser | Medium (no Safari) | High | High (incl. Safari) |
| Execution speed | Fast | Moderate | Fast (parallel) |
| Maintenance effort | Medium | Higher | Lower |
| Languages | JS/TS only | Java, Python, C#, Ruby, JS | JS, Python, Java, C# |
| Best for | JS-first teams | Legacy systems | New projects, cross-browser |
Don’t spend more than a week on framework selection. The differences matter less than getting started. A mediocre Selenium suite that runs is more valuable than a perfect Playwright architecture that’s still being planned.
Build vs Buy vs Outsource: the decision matrix
Once you’ve decided to automate, you have three options for how to do it:
Build in-house
Your own engineers write and maintain the automation suite. This makes sense when you have engineers with automation expertise, you want deep integration with your development workflow, and you’re planning to invest in automation as a long-term capability.
Cost: high upfront (engineering time), moderate ongoing (maintenance). Typical startup investment to build a meaningful regression suite from scratch: 2-4 months of one engineer’s time, or $20,000-$60,000 in loaded engineering cost. Best for Series A and later companies with stable products and dedicated QA engineers.
The hidden cost most teams miss: if an engineer making $120,000/year spends 20% of their time building and maintaining tests, that’s $2,000/month in lost engineering velocity — before you count the infrastructure and tooling. Build in-house when it’s a strategic investment, not a side project.
Buy a no-code or low-code tool
Platforms like Testim, Mabl, or Katalon let non-engineers create automated tests through visual interfaces. Lower barrier to entry, faster setup, but higher ongoing cost ($500-$2,000/month) and less flexibility for complex scenarios. Best for startups that need automation quickly and have relatively straightforward user flows.
The trap: vendor lock-in. As your application grows more complex — drag-and-drop interfaces, multi-step flows, dynamic content — low-code tests become brittle. Changing a single global button component can break dozens of visual tests. What started as a quick win becomes a maintenance burden that rivals a hand-coded suite.
Outsource to a QA partner
A specialized QA company builds and maintains your automation suite as part of an ongoing engagement. You get expertise without the hiring overhead, and the suite is maintained by people who do this full-time. Best for startups that need automation faster than they can build expertise, or companies that want automation as part of a broader QA partnership.
The key condition for outsourcing to work: the contractor must use an open-source framework and leave your team with full ownership of the suite. An agency that builds a beautiful automation suite using proprietary patterns and leaves without training your engineers creates a dependency — the suite breaks within weeks of active development and gets quietly abandoned. Mandate documentation and a handover training session as part of any outsourcing engagement.
| Build | Buy | Outsource | |
| Lowest initial cost | ✓ | ✓ | |
| Fastest implementation | ✓ | ✓ | |
| Maximum control | ✓ | ||
| Specialized expertise | ✓ | ||
| Long-term ownership | ✓ |
For most early-stage startups: start with outsourcing or a low-code tool, build in-house expertise in parallel, transition to in-house ownership once the team has the skills and bandwidth. Trying to build a sophisticated automation suite in-house from scratch, while also shipping a product, while also not having dedicated QA engineers, is how startups end up with abandoned test suites six months later.
What the code actually looks like
One reason teams delay automation is that they imagine it’s more complex than it is. Here’s a minimal but production-ready Playwright setup that a single developer can implement in a day.
Page Object Model — the right architecture from day one
The most common automation mistake is writing test scripts that directly reference UI elements. Every time a button label or input field changes, you’re updating dozens of test files. The Page Object Model solves this by separating UI selectors from test logic:
// pages/LoginPage.ts
import { Page, Locator } from ‘@playwright/test’;
export class LoginPage {
readonly emailInput: Locator;
readonly passwordInput: Locator;
readonly loginButton: Locator;
constructor(page: Page) {
this.emailInput = page.locator(‘input[type=”email”]’);
this.passwordInput = page.locator(‘input[type=”password”]’);
this.loginButton = page.locator(‘button:has-text(“Sign In”)’);
}
async login(email: string, password: string) {
await this.emailInput.fill(email);
await this.passwordInput.fill(password);
await this.loginButton.click();
}
}
If the button text changes from ‘Sign In’ to ‘Login’, you update one line — not fifty test files.
GitHub Actions configuration
Running tests automatically on every pull request requires about 30 lines of YAML. This stays within GitHub’s free tier for most early-stage startups and uploads debugging reports only when a test fails:
name: Playwright Tests
on:
pull_request:
branches: [ main ]
jobs:
test:
runs-on: ubuntu-latest
steps:
– uses: actions/checkout@v4
– uses: actions/setup-node@v4
– run: npm ci
– run: npx playwright install –with-deps
– run: npx playwright test
– uses: actions/upload-artifact@v4
if: failure()
with:
name: playwright-report
path: playwright-report/
The ‘if: failure()’ condition means you only upload reports when something breaks — keeping storage costs near zero.
Real startup case: 0 to 80% automation in 90 days
A B2B SaaS startup — project management software for construction teams, Series A, 18-person engineering team — came to TestMatick with a familiar problem. Manual regression testing before each release was taking three days. They were shipping every two weeks, so roughly a third of every sprint was QA time. The team was growing, the product was stabilizing, and the math on continuing with manual-only testing was getting worse every month.
Week 1-2: audit and prioritization. TestMatick’s team analyzed the product, mapped the user flows, and identified the 40 highest-value scenarios for initial automation — flows that ran in every release, hadn’t changed in months, and covered the majority of regression risk. Not the full product. The critical path.
Week 3-6: Playwright was selected — the team was TypeScript-first and needed Safari coverage for their iOS-heavy user base. The initial suite of 40 scenarios was written, debugged, and integrated into their GitHub Actions CI pipeline. Run time: under 25 minutes.
Week 7-10: the suite expanded to 120 scenarios covering secondary flows. Flaky tests were identified and fixed. Parallel execution was configured to keep run time manageable as coverage grew.
Week 11-12: TestMatick documented the suite architecture, trained two of the startup’s engineers on maintenance and expansion, and handed off ownership with a roadmap for reaching full coverage over the following six months.
Results at day 90: 80% of regression scenarios automated, release QA time down from 3 days to 4 hours, zero production regressions in the first month post-handoff. Total cost: $18,000. The previous manual testing approach cost approximately $12,000/month in QA time. The automation paid back in under two months — and kept getting cheaper as the suite matured.
Cost breakdown: the $5K vs $50K approach
The $5K approach
What it covers: a focused automation engagement covering your 15-20 highest-risk scenarios. Smoke test coverage for your critical path. CI integration so tests run automatically before every release. Best for pre-Series A startups that need automation coverage quickly.
Realistic timeline: 3-4 weeks from kickoff to running suite.
The $50K approach
What it covers: comprehensive regression suite covering all primary and secondary user flows, cross-browser and cross-device testing, performance benchmarking, CI/CD integration, documentation, team training, and 3-6 months of ongoing maintenance. Best for Series A and later companies with stable products and high release frequency.
Realistic timeline: 8-12 weeks for full suite, ongoing maintenance thereafter.
The honest middle ground
Most startup automation engagements fall between $15,000 and $35,000 for the initial build, with ongoing maintenance at $2,000-$8,000/month. The ROI calculation is usually straightforward: if you’re spending more than $5,000/month on manual regression testing, automation almost always pays back within 6 months.
Measuring whether automation is actually working
Test coverage percentage is a metric, not a goal. A suite with 90% coverage that tests the wrong things gives less confidence than 30% coverage on the right scenarios. Measure business outcomes instead:
- Regression execution time — how much manual testing time disappeared per release?
- Release frequency — can the team deploy more often than before?
- Production defects — are users seeing fewer bugs? This is the metric that matters most.
- Developer time saved — hours moved away from repetitive manual verification
- Cost per release — has delivery become cheaper in total, not just in QA time?
The startup above tracked all five from day one. By month three: regression time down from three days to four hours, release frequency doubled, production incidents down 70%. The $18,000 investment paid back in under two months — not because the automation was perfect, but because it was focused on the right things.
How to implement test automation as a startup: step by step
Here’s the practical sequence that works for most startups starting from zero:
Step 1: Confirm you’re ready
Check the three conditions: stable core flows, increasing release frequency, paying customers. If all three are true — proceed. If not — invest in manual testing first.
Step 2: Map your critical path
List the 10-15 scenarios that run in every release and directly impact revenue or retention. These are your first automation targets — not the full product.
Step 3: Choose your framework
JavaScript-first team, no Safari needed: Cypress. Cross-browser required or non-JS team: Playwright. Legacy system or existing Selenium investment: Selenium. Spend no more than one week on this decision.
Step 4: Decide who builds it
In-house if you have bandwidth and expertise. Outsource if you need speed and don’t have dedicated QA engineers. Low-code tool if the product is simple and budget is very tight.
Step 5: Build the initial suite
Write tests for your critical path scenarios only. Set up Page Object Model architecture from day one. Target run time under 10 minutes.
Step 6: Integrate with CI/CD
Connect the suite to GitHub Actions or your existing pipeline. Tests should run automatically on every pull request. Failures block deployment.
Step 7: Measure and expand
Track regression time, release frequency, and production defects from day one. Expand coverage gradually as the product stabilizes. Add secondary flows only after the critical path suite is stable and trusted.
Frequently Asked Questions
Do we need a dedicated QA engineer to implement automation?
No. A QA partner can build and initially maintain the suite. What you do need is at least one engineer who understands the codebase well enough to review the automation architecture and take ownership of maintenance over time. Automation without internal ownership tends to decay — scripts break, nobody fixes them, and the suite gets quietly bypassed.
How long before automation starts saving us time?
Typically 2-3 months after the suite is operational. The first month is setup and stabilization. By month two, the suite is reliable enough to replace most manual regression. By month three, the time savings are measurable and consistent. The startup in our case study saw full payback in under two months.
What if our product changes a lot?
Automate the stable parts — the core flows that don’t change — and keep manual testing for the parts that do. Trying to automate a rapidly changing UI is how you end up with a maintenance burden that exceeds the value of the automation. Start narrow, prove the value, and expand as the product stabilizes.
Is Playwright really better than Cypress for startups in 2026?
For most new projects: yes. The main reason is Safari support — a significant portion of US users are on iOS, and Cypress still doesn’t support Safari natively. Playwright also handles multi-tab flows and has better parallelization out of the box. If your team is JavaScript-only and Safari isn’t a concern, Cypress is still a solid choice.
Ready to start automating without the enterprise budget?
TestMatick has been helping startups build automation that actually works since 2009. We offer a free pilot project — no contract, no prepayment. You see the quality before you commit to anything.
-> Schedule a Strategy Call — testmatick.com


0 Comments